Prerequisites
Connecting to the AWS Console
Get Connection Information
1.
Source EC2 Database Server info
2.
Target EC2 Jump Server
3.
Target SQL Server on RDS
Creating an S3 Bucket
Working on the Source SQL Server DB Server
1.
Connecting to the Source SQL Server via RDP
2.
Connecting to SQL 2017 via SSMS
3.
Backup a Database via SSMS
4.
Transferring the backup to S3
Working on the Target RDS
1.
Prerequisites
2.
Creating an Option Group for SQL Server on RDS
3.
Configuring the Option Group for SQL Native Backup/Restore
4.
Adding the Option Group to the RDS SQL Instance
5.
Using an EC2 Jump Server to Access RDS
6.
Working with SQL Server on RDS via SSMS
7.
Restoring a Database on RDS via SSMS
Home
Author
Clear History
© 2019 Amazon Web Services, Inc. or its Affiliates. All rights reserved.
Edit this page
MSSQL to SQL Server on Amazon RDS Workshop
>
Working on the Target RDS
> Creating an Option Group for SQL Server on RDS
Creating an Option Group for SQL Server on RDS
Sign In
to the AWS Management Console and open the Amazon RDS console at
https://console.aws.amazon.com/rds/
Make sure you are in the region where the Target RDS is located:
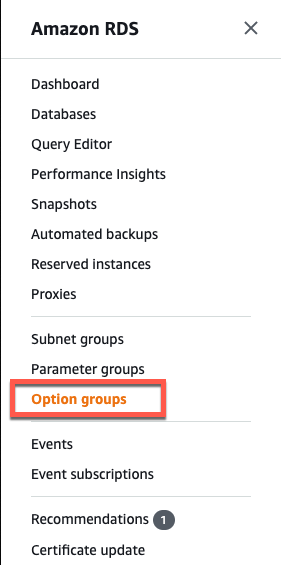
In the navigation pane, choose
Option Groups
Choose
Create Group
In the Create option group window, do the following:
For
Name
, type a name for the option group that is
Unique
within your AWS account. The name can contain only letters, digits, and hyphens.
For
Description
, type a brief description of the option group. The description is used for display purposes.
For
Engine
, choose the DB engine that
matches the target RDS SQL Instance
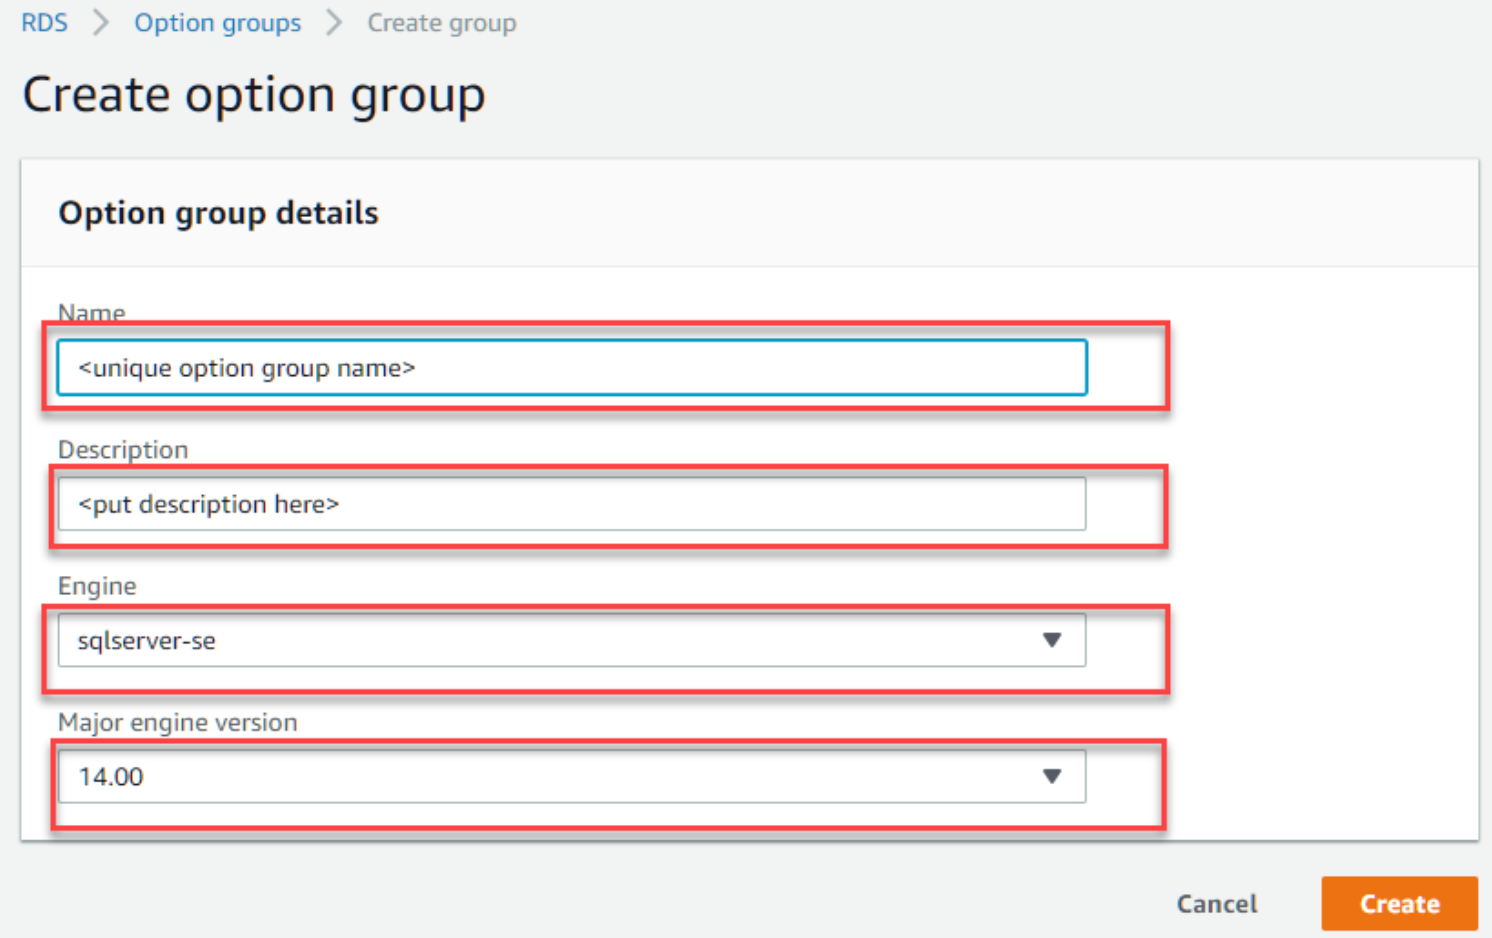
For
Major Engine Version
, choose the major version that
matches the target RDS SQL Instance
To continue, choose
Create